Managing Data Object Content
Data object management page
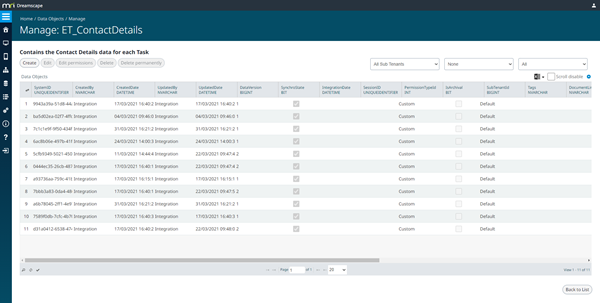
You manually create, edit, and delete rows in a data object using the data object Manage page.
To access the Manage page:
Select the data object in the list on the Data Objects page, and click Manage content. Alternatively, double-click the data object in the list. The Manage page lists the data rows in the data object. 
- In the drop-down lists at the top of the page you can filter the list by:
- Sub Tenant
- Synchronised / Not Synchronised
- All users or specific users
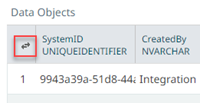
- The first 14 columns are system related, followed by the user data columns. You can hide or show the system columns using the button at the top of the row numbering:

-
 Below the grid, these buttons can be used to delete a selected row, find records, or reload (refresh) the grid.
Menu operations
Creating a new row
- On the Manage page, click Create, and enter details for the new row on the Create page.
- The permission that is applied to a row is set by the value of PermissionTypeId. Choose the setting from the drop-down list; by default, this field is populated by the value set in New Row Default Permission in the structure.
- The data in a data object may be segregated by sub tenant. You can set this in the SubTenantId field drop-down list; this new row will then be available only to users assigned to the specified sub tenant.
- You can add data tags in the Tags field to identify or categorise the data. Separate multiple tags with a comma; for example, photo,image,landscape.
- The DocumentLinks field cannot be updated manually and never shows content in the Create or Edit pages. In the Manage page it shows how many documents there are in a link created by a document linker control.
- Click Create to save the new row.
Editing an existing row
Select the row in the list and click Edit. On the Edit page you can only make changes to the data and to the structure field PermissionTypeId. Click Update to save the changes.
Deleting a row (soft delete)
Select the row in the list and click Delete. In the pop-up click Continue.
The permanent deletion of the row is controlled by the setting of Administration > Cleaner Settings > Remove deleted data object entries.
Deleting a row permanently
Select the row in the list and click Delete permanently. In the pop-up click Continue.
Changing permissions
- Select the row in the list and click Edit permissions. On the Edit page, scroll down to the field PermissionTypeId.
- Select the permission type from the drop-down list. The permission that is applied to a row by default is set by the value of New Row Default Permission in the data object structure.
- Click Update to save the change.
Manually adding an image to a data object
You can manually add an image from your computer directly into a data object in exactly the same way as an image panel would; you can then treat them as images stored by an image panel.
- In the portal select Data > Data Objects.
- Select the data object and click Manage content.
- In the Manage page, click Create.
- In the form on the Create page, find the VARBINARY field.
- Click Choose File next to the VARBINARY field, select the image file and click Open.
- Complete any other fields, for example, image description.
- Click Create
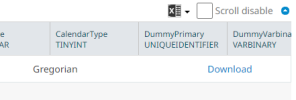
You should see the new image in the Manage page showing 'Download' in the VARBINARY column:
